

Affiliate disclosure: This article contains affiliate links. If you purchase through them, we may earn a commission at no additional cost to you. As an Amazon Associate I earn from qualifying purchases.
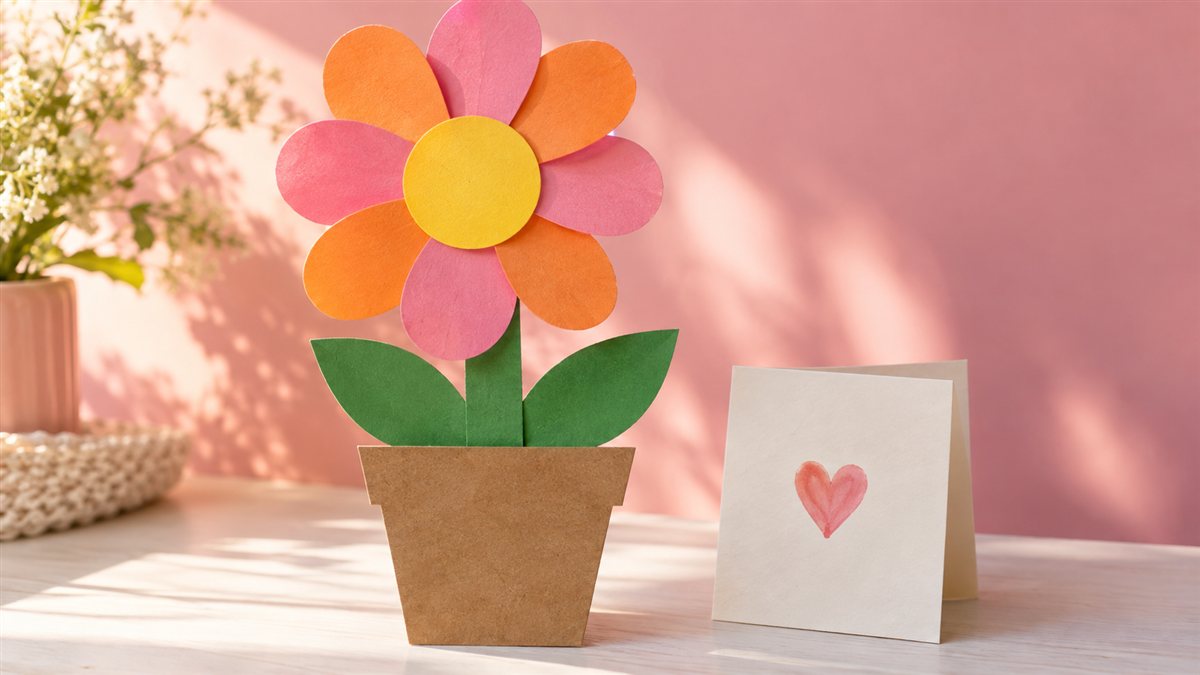
A handmade gift can say something a shop-bought card cannot: your child chose the colors and the message. This Mother’s Day flower craft turns a brown paper bag and a few broad paper shapes into a flat flowerpot gift.
You will get a materials list, six assembly steps and ways to adapt the activity for different abilities. The final step adds your child’s own words, so the gift feels personal rather than like another completed template.
The simplest version needs a brown pot shape, a green stem and one colorful flower. An adult can cut those pieces in advance. Your child can choose where they go and what the finished flower should say.
Use child-labeled supplies, check warnings and supervise throughout. An adult should handle cutting. Keep glue, caps and scraps out of mouths, then wash hands. See the CPSC art and craft safety guide.
Plan your Mother’s Day flower craft
This is a flat paper picture, not a plant or a toy for an infant. Start with a clean paper bag, a sheet of card for the background, colored paper, a child-labeled glue stick and a drawing tool. Use the drawing tool’s age guidance. Draw the flower’s face instead of attaching googly eyes.
Keep the background large enough for a broad stem and a few big petals. Tiny pieces add more handling without necessarily improving the gift. If you are using only one color of paper, your child can decorate the petals with patterns.
An adult should prepare scissors and any difficult cuts. Put finished pieces in a shallow tray or on a second sheet so they do not disappear beneath the background. Keep the table separate from snacks, and clear the scraps when you finish.
Choose what your child will do
The youngest participant may enjoy choosing two colors and pressing an adult-prepared shape onto the page. A preschooler can arrange petals and draw details. A child who is ready for cutting can help with simple shapes under direct supervision.
Try a choice that invites action: would you like a pink flower or an orange flower? Avoid making every decision for them, but do not turn the project into a string of questions. One clear invitation at a time keeps the assembly manageable.
If your child dislikes sticky materials, place the shapes on the page first and let the adult apply the glue. They can still direct the design. You can also make a crayon flower on a folded card and skip the cut-paper pieces entirely.
6 steps to make the paper flower gift
-
Prepare a broad paper pot
An adult cuts a simple trapezoid from a clean brown paper bag. Position it near the bottom of a background card, leaving room for the flower above.
-
Place the stem
Add one broad green paper strip behind the pot, pointing up the page. Check the layout before applying a light layer of glue.
-
Arrange the leaves
Set two large leaf shapes beside the stem. Your child can turn them until the arrangement feels right, then press them onto the background.
-
Build the flower
Place a large paper circle above the stem. Arrange a few broad petals around it, partly tucked underneath or beside the center, and glue them down.
-
Add drawn details
Draw a face, stripes or other details if your child wants them. Leave the flower plain if they prefer. Check that the larger pieces are secure.
-
Record a personal message
Ask what your child would like to tell the recipient. Write their words on the pot or a separate folded card, then allow the glue to dry before gifting.
Make the message the most personal part
A prompt such as what do you like doing with Mom can lead to a specific memory. Maybe it is reading on the sofa, walking to the park or singing in the car. Write the child’s actual answer rather than replacing it with a polished rhyme.
A child who does not want to talk can choose a drawing. A child who is learning to write can add a first letter or a short name. Give help when asked, and leave room for an imperfect mark that belongs to them.
This Mother’s Day flower craft can also celebrate a grandmother, foster parent or another caring adult. Ask who the gift is for before writing a label. The activity can acknowledge the child’s own family rather than assume every home looks the same.
Three simple variations
For a card, make a smaller flower on the front of a folded sheet and put the message inside. For a wall picture, use a full background card and display it in a suitable frame after drying. For a sibling project, give each child a separate flower and assemble the flowers on one larger background.
Keep the design flat. This avoids the need for a real stick stem, weighted pot or extra fasteners. If your child wants more texture, try broad crayon patterns rather than loose glitter or small decorations.
A plain brown pot also provides a useful writing space. Before adding the flower, check where the message will fit. If the picture becomes crowded, a separate gift card is easier than squeezing words into the remaining gap.
Optional supplies to compare
Start with what you already own. These are examples of supplies for different jobs, not a required shopping list. Check the current package, age label and quantity before ordering.
Assorted construction paper for folded books, flowers and cut-paper pictures. The observed bulk pack is 480 sheets in ten colors, 9 by 12 inches. Check whether this quantity fits your storage and choose smaller quantities if needed.


A paper-craft adhesive that goes on purple and dries clear. The observed pack includes three 22 gram sticks. Follow the label and supervise use; caps and glue are not play or food items.


Twelve extra jumbo crayons for drawing faces, story pictures and paper firework bursts. The observed listing describes a thicker format for kindergarten and primary-school use. Follow the actual age label, supervise coloring and remove broken pieces.


Finish and present the Mother’s Day flower craft
Place the gift somewhere flat to dry, following the adhesive label. Test the broad shapes gently before lifting the picture. If a petal peels away, add a small amount of glue and let it dry again.
Keep the recipient’s message visible when you wrap it. A clean large envelope or a folder can protect a flat picture. Avoid storing a damp glued project between books, where it may stick to pages.
If your child wants to explain the gift, let them point out their color choices or read the message. There is no need for a rehearsed speech. A photograph can preserve the memory after the paper picture has had its turn on display.
Paper flower questions
Can a toddler help with this Mother's Day flower craft?
Yes, with an adult preparing and managing the materials. Offer large shapes to choose from, or make a simple drawing version. Match the activity to the child’s behavior and the supplies’ age labels.
Do I need a printable template?
No. A broad pot, strip stem, two leaves and a circle with a few petals can be drawn and prepared by an adult. Exact symmetry is unnecessary.
What can we use instead of a brown paper bag?
Brown paper or a pot shape drawn on a background card works. The bag is simply an accessible paper source; it is not essential.
How do we make it personal?
Use the child’s chosen colors and record a specific message or memory. A drawing they select can be the message if they prefer not to speak or write.
A gift with your child's voice
- Prepare broad pieces.
- Leave room for choices.
- Add a personal memory or message.
Keep the construction simple and let the personal message carry the meaning. This Mother’s Day flower craft is ready when the paper pieces are dry and your child’s words or drawing have a place.
Try book crafts for kids for another paper activity. Original topic inspiration: Maternity Comfort Solutions. This guide uses original assembly wording and adaptations; it does not reproduce the source photographs or template.