

Affiliate disclosure: This article contains affiliate links. If you purchase through them, we may earn a commission at no additional cost to you. As an Amazon Associate I earn from qualifying purchases.
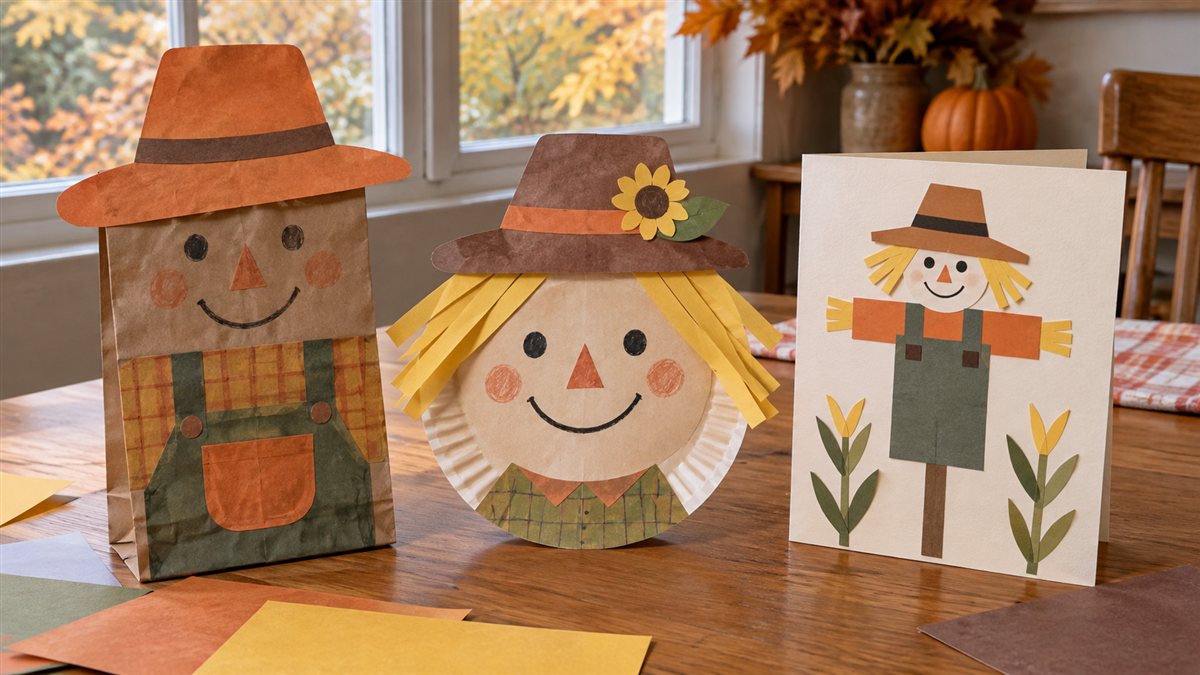
Fall decorations do not need to start with a complicated craft kit. These scarecrow crafts for kids use paper bags, plates and familiar shapes to make friendly harvest characters.
You will get eight ideas, help choosing an appropriate project and a simple plan for turning the finished pieces into a fall display. Start with a drawn paper-bag face if your child wants the quickest result. The final idea brings the characters together into a story scene.
The designs are suggestions, not templates that children have to match. A scarecrow can have a crooked hat, a bright shirt or a face that looks nothing like the example. Leave room for those choices.
Use child-labeled supplies, read warnings and supervise closely. Let an adult handle cutting. Keep glue, caps and scraps out of mouths, then wash hands. See the CPSC craft safety guide.
Prepare scarecrow crafts for kids
Gather a clean paper bag or plate, colored paper, a suitable drawing tool and child-labeled glue. An adult can prepare broad shapes for hats, leaves and clothing. Draw eyes and buttons directly on the paper rather than adding small loose decorations.
Use one background sheet to hold the pieces and one spare sheet for trying marks. A tray or washable mat can define the work area. Set out only the materials for the chosen project; the whole fall supply box does not need to be on the table.
These projects are for supervised creative play, not infant toys. If a child is mouthing materials, choose an adult-led drawing version and manage the pieces yourself. Product labels and the child’s behavior matter more than a general age suggestion.
1. Draw a paper-bag puppet
Draw a face on the flap of a clean brown paper bag. Add a large hat cut by an adult, then draw clothing on the lower part. Keep decorations flat so the bag remains easy to open.
Invite your child to choose a name and one thing the puppet likes about fall. The puppet can tell a story from the table without being waved near another child’s face. A plain drawn version works if glued pieces keep peeling away.
2. Make a paper-plate face
Use a plain paper plate as the face. Draw features, then add broad flat paper hair and a hat. Arrange the hat before gluing so the face remains visible.
Give the face a feeling if your child wants one: happy, curious or sleepy. Ask what might have happened to make the scarecrow feel that way. Avoid treating one expression as the only correct result.
3. Build a shape scarecrow
An adult prepares a large rectangle for the body, a circle for the head and broad strips for the arms and legs. Arrange them on a background sheet before applying glue.
Your child can experiment with where the shapes go. A triangle can become a nose or hat. You can name a shape while handling it, but the picture does not need to turn into a lesson with right and wrong answers.
4. Create a folded greeting card
Fold a sheet of card and draw a scarecrow on the front. Keep any glued paper shapes flat and clear of the crease. Inside, add a short greeting your child chooses.
The card can welcome fall, thank a helper or invite a relative to see the child’s drawings. Give it a real purpose if possible. A child who is not writing yet can dictate the message or draw it.
5. Make a paper-patch picture
Draw a simple shirt and trousers on a large paper character. Let your child add broad contrasting paper patches. Try patterned crayon marks inside the patches before gluing.
A patch can be a square, circle or irregular shape. Show how two different patterns look beside each other, then let the child choose. Tiny buttons, sequins and real straw are unnecessary for this version.
6. Design a harvest background
Create a scarecrow on one side of a sheet, leaving room for a field. Draw tall plants or add broad green paper strips and large orange pumpkin shapes.
Keep it an imaginary farm. Your child may decide the scarecrow watches flowers, apples or a vegetable garden. Add a path or sun if they want more details, rather than filling every empty space for them.
7. Make a name-sign scarecrow
Give the scarecrow a broad blank sign to hold in the picture. An adult can write a first name, a family nickname or a word the child wants to see. The child can add their own marks beside it.
A name sign can be fun without becoming handwriting practice. Use a pretend name if you plan to share the picture publicly. Leave identifying details off photographs of children’s work.
8. Build a friendly scarecrow story scene
Combine a few separate paper characters on a large background after the glue has dried. Add a drawn path, garden or gathering place. Each participant can bring one character to the scene.
Ask what the characters are doing together. They might be sharing a picnic, looking for a hat or watching the weather. This final project gives the earlier crafts a second use without requiring another set of supplies.
Optional paper-craft supplies
Use suitable supplies you already have before buying more. The following examples serve different jobs: a paper base, an adhesive and a drawing tool. Check current package sizes and age instructions.
Assorted construction paper for folded books, flowers and cut-paper pictures. The observed bulk pack is 480 sheets in ten colors, 9 by 12 inches. Check whether this quantity fits your storage and choose smaller quantities if needed.


A paper-craft adhesive that goes on purple and dries clear. The observed pack includes three 22 gram sticks. Follow the label and supervise use; caps and glue are not play or food items.


Twelve extra jumbo crayons for drawing faces, story pictures and paper firework bursts. The observed listing describes a thicker format for kindergarten and primary-school use. Follow the actual age label, supervise coloring and remove broken pieces.


Adapt the activity without taking it over
For a child who wants immediate action, offer a prepared bag and one drawing tool. For a child who enjoys arranging things, leave the broad shapes unglued so they can try different layouts. For a child who prefers telling stories, let them direct while an adult assembles.
Leave the example out of sight once the idea is understood if your child begins worrying about matching it. Say what you notice about a choice, such as the big yellow hat, rather than correcting the face to look like yours.
Scarecrow crafts for kids can end after one small character. Store unused supplies away before taking a break. You can return to a shared scene later, but a child’s interest does not have to last for every idea in the guide.
A simple fall display plan
-
Choose one base
Start with a bag, plate or flat background sheet.
-
Leave one design choice open
Offer a choice of hat, face or clothing color.
-
Dry and check
Follow the adhesive instructions and check for peeling pieces.
-
Tell a short story
Ask what the scarecrow is watching or doing in the scene.
Scarecrow craft questions
Which scarecrow crafts for kids need the fewest supplies?
A drawn paper-bag puppet or a folded greeting card can begin with paper and a suitable drawing tool. Add glue only if you are attaching broad shapes.
Do we need real straw?
No. Broad paper hair and drawn details work for these projects. They also make it easier to keep the finished design flat.
Can preschoolers make the shapes themselves?
Some can help with simple cuts when ready and directly supervised. An adult should prepare difficult pieces and match tools to the child’s ability and their labels.
What if my child does not want to glue?
Draw the face and clothing instead, or let the child arrange the shapes while the adult applies glue. Telling a story about the picture is another way to participate.
Make one friendly fall character
- One base.
- Broad paper details.
- A name, feeling or story.
Choose the simplest base and let the child make a meaningful choice. Scarecrow crafts for kids do not need a perfect template to become a decoration or a story starter.
Change the theme with our paper firework crafts. Original topic inspiration: Maternity Comfort Solutions. The wording and project variations here are original editorial suggestions; the source templates and photographs are not reproduced.