

Affiliate disclosure: This article contains affiliate links. If you purchase through them, we may earn a commission at no additional cost to you. As an Amazon Associate I earn from qualifying purchases.
The most useful feeding registry essentials support how you plan to feed and how you will clean up afterward. Start with a modest setup you understand, rather than a large bundle of unfamiliar pieces. Babies and feeding plans can change, so leave room to adjust without replacing an entire cupboard.
You will work through eight decisions, see two product examples and finish with a complete feed-to-cleanup checklist. This is a registry planning guide, not a feeding prescription. Bring difficulty feeding, growth concerns or other health questions to your baby’s care team.
In this guide
Article sections
Your registry decision in three steps
- Start with the task your family needs to complete.
- Check fit, instructions and the supplies you already own.
- Use the final checklist to fill real gaps before adding extras.
Feeding registry essentials: 1. Write down your intended feeding routes
Your initial plan may involve breastfeeding, pumping, formula or a combination. List the equipment required for the routes you expect to use, and identify who can help if the plan changes. Do not buy every possible setup to feel prepared. A useful backup plan includes access to advice and supplies, not just more unopened boxes.
2. Choose a small starting bottle selection
Consider capacity, nipple flow, the number of pieces and whether replacements are easy to obtain. Compare what you would actually wash and assemble. The Dr. Brown’s example uses an internal vent, which adds cleaning steps. An anti-colic label is not a promise of better sleep or symptom relief. Expand the supply after learning what works for your situation.
3. Plan for spare compatible parts
A spare nipple or ring is useful only when it belongs to the exact bottle system. Note the model and flow details so a gift buyer can avoid a similar-looking replacement. Store small parts where the caregiver can identify them, and follow inspection and replacement instructions. This is a better planning task than adding a random accessories pack.
4. Put cleanup cloths where feeds happen
A few washable cloths nearby can make ordinary cleanup simpler. Count your feeding locations and laundry routine rather than choosing a quantity from a universal list. Keep clean and used cloths separate. The Yoofoss example is a white ten-pack; a larger pack may suit some households, but it is not proof that everyone needs that number.
Product choices for feeding registry essentials
These five bottle brands offer different vent layouts and pack sizes. None guarantees gas relief. Match flow and cleaning needs to your own feeding routine.
5 product choices at a glance


5. Set aside proper washing supplies
CDC guidance calls for disassembling feeding items, cleaning after use and thorough air drying. If washing by hand, use a clean basin and brush reserved for the task rather than putting parts directly in the sink. Check the bottle manufacturer’s permitted cleaning methods. Organize these basic supplies before deciding whether another countertop appliance solves a real problem.
6. Decide how sanitizing will work
Read both the care instructions and CDC guidance. Extra sanitizing needs depend on factors such as age, prematurity and immune health, as well as your cleaning method. You may already have a suitable method. A dedicated device is one possible convenience, not an automatic registry requirement. Ensure whoever helps with feeds understands the routine you choose.
7. Keep dry storage and milk storage separate
Bottle parts need clean, protected storage after drying. Milk storage has its own instructions and containers. Label your supplies so those jobs are easy to distinguish. If you will pump, check compatible parts and storage requirements before purchasing a bundle. Do not assume a storage accessory includes the pump or fits every brand.
8. Ask about support before adding more equipment
Check what your care team, lactation service or insurer can help you access when relevant. Questions about pumping fit or milk preparation may be easier to resolve with guidance than an extra gadget. Record useful contacts alongside the shopping list. Practical help with cleaning and meals can also support a feeding routine without creating another item to maintain.
Feeding registry essentials: your final checklist
Walk through one complete feed on paper: prepare what you need, feed responsively, deal with leftovers according to current milk guidance, take equipment apart, wash, dry and store. List the supplies needed for each step. Put only the gaps on the registry. Ask a second caregiver to follow the same plan so your setup is understandable when you are tired.
Save this feeding registry essentials checklist, then revise it as your family’s needs and available space become clearer.
Before you share the registry
-
Inventory
Check what is already owned, promised or purchased.
-
Match
Record the exact model, size or job for each remaining item.
-
Rehearse
Walk through the real routine with another caregiver and fill the gaps you find.
Compare feeding registry essentials: product choices
When comparing feeding registry essentials, use the task, design and fit checks below to narrow your list. A brand name or marketing label cannot establish that an item suits your baby, home or vehicle. Prices and availability can change, so use the links to check the exact listing.
Compare selected registry listings
|
Bottle feeding
Dr. Brown’s Options+
|
VS |
Bottle feeding
Philips Avent AirFree
|
|---|---|---|
|
Bottle feeding
|
Main task |
Bottle feeding
|
|
Internal vent
|
Design |
AirFree vent insert
|
|
4 oz four-pack
|
Selected listing |
4 oz bottle set
|
|
Match nipple flow
|
Before choosing |
Check Flow 1 suitability
|
| Check details on Amazon | Check details on Amazon |
Dr. Brown’s Options+ serves the bottle feeding task. Internal vent is a design option. Before choosing, match nipple flow. Extra vent parts require cleaning.
- Internal vent is a design option
- Extra vent parts require cleaning
Philips Avent AirFree serves the bottle feeding task. AirFree insert offers another design. Before choosing, check Flow 1 suitability. Insert needs assembly and cleaning.
- AirFree insert offers another design
- Insert needs assembly and cleaning
MAM Easy Start serves the bottle feeding task. Vented base offers a different layout. Before choosing, check base seal. Base and seal need careful reassembly.
- Vented base offers a different layout
- Base and seal need careful reassembly
Tommee Tippee Advanced serves the bottle feeding task. Two-pack allows a smaller trial. Before choosing, follow sterilizing instructions. Separate vent components need cleaning.
- Two-pack allows a smaller trial
- Separate vent components need cleaning
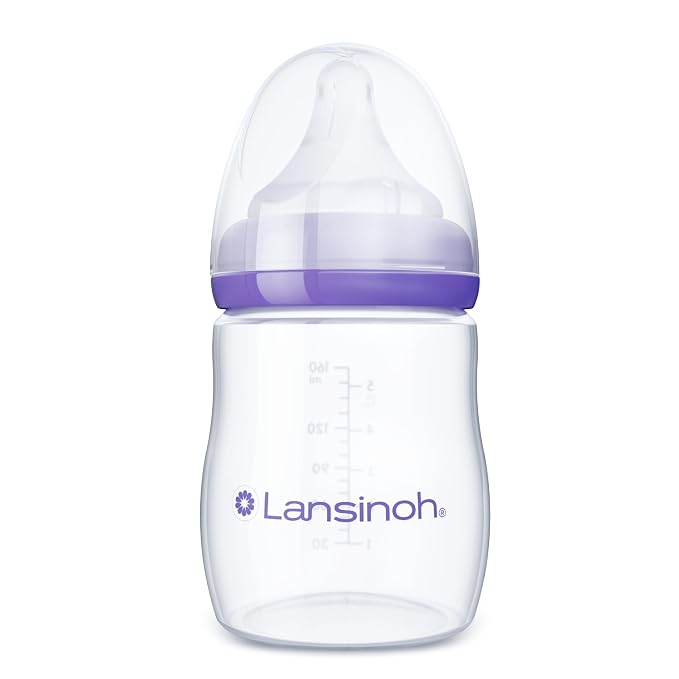
Lansinoh NaturalWave serves the bottle feeding task. A single bottle is a smaller trial. Before choosing, check Size S flow. Nipple flow still needs individual review.
- A single bottle is a smaller trial
- Nipple flow still needs individual review
Registry questions answered
How many bottles should I put on my registry?
Start from your expected feeding frequency, cleaning schedule and feeding plan. A modest initial supply gives you room to assess fit and flow before stocking many identical bottles.
Do I need a bottle sterilizer?
A dedicated appliance is not always necessary. Check CDC cleaning and sanitizing guidance, your baby’s circumstances and which methods the manufacturer permits.
Should I buy newborn spoons with feeding supplies?
You can list later-stage items separately if you have storage, but utensils for solids are not a substitute for your newborn feeding setup. Match them to the baby’s readiness when that stage arrives.
Continue building your registry
Baby Registry Must Haves: 10 Important Essentials to Start With
Diapering Registry Essentials: 9 Important Setup Checks
Browse all Baby Registry guides.
Sources and how this guide was prepared
This guide offers practical registry planning, not individual medical advice. iBabyMama has not personally tested or clinically evaluated these products. Product examples use the observed listings and saved SiteStripe links; check current details, suitability and instructions before buying. Safety guidance and listings were checked October 8, 2026.
Topic context: What to Expect’s baby registry checklist. This article uses an original task-based checklist and independently checked primary guidance.